Overview
Buying a bandsaw for hobby work in India is a very costly proposition. So the next best option was to start using a Jigsaw mounted inverted on a table. I was inspired to make one based on an article published in issue #23 of Shopnotes magazine for making a table mounted jigsaw with a blade guide. Later I saw a video on Youtube by Sergio Acuña Padin ("Some talking about my homemade jigsaw table"),
and based on his idea of a sledge, built one for my table.
I have found the jigsaw table quite useful and easy to use while cutting parts for my hobby projects including ripping thin strips for aeromodelling work.
I started by designing one on Sketchup.
Build
A. Building the Table
Instead of building the jigsaw table box, I used the speaker cabinet of my old sound system which I was no longer using. I ripped off the speakers and the front panel including the speaker grill. Since the speaker box was a bit smaller than the jigsaw height, I added small pieces of 3/4 inch (18mm) ply to the base to raise the box. Using a router cut a hole for mounting the jigsaw support plate.


For supporting the Jigsaw mounting plate, made a 1/4 inch rabbet around the cut. Since I planned to use a 1/4 inch thick mdf piece as the mounting plate, the rabbet was made 1/4 inch deep so that the plate ended flush with the table surface.


Next step was to cut the hole in the front panel. Used a 2 inch forstner bit to cut the hole and then cut off the sides to make a "mouse hole"
The next step was to add the feet which are triangular plywood pieces at the aft portion of the table and a 2 inch wide strip in the front. This will enable the user to slip a clamp in the mouse-hole and tighten the table to a work surface.

B. Mounting the Jigsaw to the mounting plate.
I took off the Jigsaw base plate and used that as a guide for marking the locations of the ply pieces used for support. Glued 1 inch wide strips at the two ends as the base plate had a lip all around.


Next glued a strip 1 1/8 inch wide of 1/8 inch ply to the front support. This created a rabbet for holding the jigsaw.
Next made a similar removable plate for holding the aft end. This can be screwed so that the jigsaw remains removable.


The mounted jigsaw is just dropped into the hole made for the mounting plate in the table. The weight of the jigsaw holds it in place and I have not felt a need to screw down the mounting plate to the table. To help in adjusting the jigsaw angle, I made two holes for allowing for a screwdriver to reach the adjusting screws on the jigsaw. Before using the jigsaw table, I adjusted these screws so that the blade was vertical to the mounting plate.

I tried out the table setup by cutting out a shaped piece of 3/4 inch thick ply and found it more convenient than while making a similar cut using the jigsaw in an upright position as both hands are free to maneuver the piece being cut.

C. Blade Guide
While the blade is supported by the jigsaw mechanism at the lower end, the blade is floating and tends to drift while cutting thicker wood. To prevent the drift, took the idea from Shopnotes and added two guide bearings for supporting the blade. This also required changing the jigsaw blade to a longer one. I am using blades 5 or 6 inch long.
Using two bolts, mounted two small bearings to two pieces of aluminum angle. The slots for the bolts were filed to an oval shape so that the bearings could be adjusted (left and right) to grab the blade lightly. Remember there is a left and a right bearing support arm (mirror images).


The bearing support arm is made as a bridge mounted at the aft end of the table. The bridge is made by gluing 2 inch wide 1/2 inch thick ply strips.

I began by drilling two holes on each side of the box for holding the bridge. The height of the bridge is adjustable. Initially I started by using two bolts tightened with wing nuts on each side, but later replaced with an insert and knobs for holding the bridge as this setup enables for easier removal of the bridge. The two side pieces were attached.

The cantilever section of the support arm was built by sandwiching three strips of 1/2 inch ply.

and bearings attached to the front end.


The bridge was initially held by two screws while testing the concept, but after completing the structure the horizontal section was mated with the vertical sections using pocket holes drilled in the vertical supports.
I made a hold-down for preventing jitter while doing freehand cuts. The hold-down is attached to the bearing support arm and can be removed/attached using a bolt which screws into a T-nut attached to the support arm. A circular knob made out of 1/2 inch thick ply was attached to the bolt.

The arms were cut off a kitchen cutting board while the U shaped structure was made of ply pieces.


The hold-down clearance is adjusted by raising/lowering the bridge enough to allow for free movement of the part being cut.
D. Rip Fence
For ripping thin strips, specially of balsa for aeromodelling, made a rip fence for guiding the sheet. Since the speaker box that I have used as a table did not have any ledges, I had to cut two slots on the table surface for attaching the fence.


 (By mistake, I had initially drilled the holes at the wrong end of the slot as seen in the picture above. The error was later rectified and the wrong hole was plugged while new holes were drilled at the ends towards the edge)
The fence is made of 1 inch wide aluminum angle strip. I riveted two pieces of the angle iron at right angles to the fence to serve as guides for keeping the fence aligned to the blade. The fence is tightened to the table by two bolts/washers which can be slipped through the two holes at the two ends of the slot. the bolts are tightened using wingnuts.

F. Small Parts Sledge
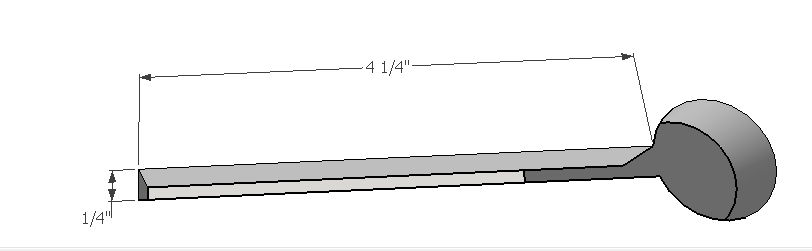
The Sledge for cutting small parts is simply a 1/4 inch thick plywood piece with two runners which move along the sides of the table. Once I completed attaching the side runners, I just ran through the ply piece so that the jigsaw blade made a cut in the centre. This groove was used for indexing the fence/back support at 90 degrees. the fence is nothing but a piece of 1/2 inch plywood strip.


For holding the pieces being cut firmly, I made a holddown which can be attached or removed if not required from the fence.


The sledge is useful for cutting straight cuts at 90 degrees in small pieces.
Sketchup File
Next made a similar removable plate for holding the aft end. This can be screwed so that the jigsaw remains removable.


The mounted jigsaw is just dropped into the hole made for the mounting plate in the table. The weight of the jigsaw holds it in place and I have not felt a need to screw down the mounting plate to the table. To help in adjusting the jigsaw angle, I made two holes for allowing for a screwdriver to reach the adjusting screws on the jigsaw. Before using the jigsaw table, I adjusted these screws so that the blade was vertical to the mounting plate.

I tried out the table setup by cutting out a shaped piece of 3/4 inch thick ply and found it more convenient than while making a similar cut using the jigsaw in an upright position as both hands are free to maneuver the piece being cut.

C. Blade Guide
While the blade is supported by the jigsaw mechanism at the lower end, the blade is floating and tends to drift while cutting thicker wood. To prevent the drift, took the idea from Shopnotes and added two guide bearings for supporting the blade. This also required changing the jigsaw blade to a longer one. I am using blades 5 or 6 inch long.
Using two bolts, mounted two small bearings to two pieces of aluminum angle. The slots for the bolts were filed to an oval shape so that the bearings could be adjusted (left and right) to grab the blade lightly. Remember there is a left and a right bearing support arm (mirror images).


The bearing support arm is made as a bridge mounted at the aft end of the table. The bridge is made by gluing 2 inch wide 1/2 inch thick ply strips.

I began by drilling two holes on each side of the box for holding the bridge. The height of the bridge is adjustable. Initially I started by using two bolts tightened with wing nuts on each side, but later replaced with an insert and knobs for holding the bridge as this setup enables for easier removal of the bridge. The two side pieces were attached.

The cantilever section of the support arm was built by sandwiching three strips of 1/2 inch ply.

and bearings attached to the front end.


The bridge was initially held by two screws while testing the concept, but after completing the structure the horizontal section was mated with the vertical sections using pocket holes drilled in the vertical supports.
I made a hold-down for preventing jitter while doing freehand cuts. The hold-down is attached to the bearing support arm and can be removed/attached using a bolt which screws into a T-nut attached to the support arm. A circular knob made out of 1/2 inch thick ply was attached to the bolt.

The arms were cut off a kitchen cutting board while the U shaped structure was made of ply pieces.


The hold-down clearance is adjusted by raising/lowering the bridge enough to allow for free movement of the part being cut.
D. Rip Fence
For ripping thin strips, specially of balsa for aeromodelling, made a rip fence for guiding the sheet. Since the speaker box that I have used as a table did not have any ledges, I had to cut two slots on the table surface for attaching the fence.


The fence is made of 1 inch wide aluminum angle strip. I riveted two pieces of the angle iron at right angles to the fence to serve as guides for keeping the fence aligned to the blade. The fence is tightened to the table by two bolts/washers which can be slipped through the two holes at the two ends of the slot. the bolts are tightened using wingnuts.

F. Small Parts Sledge
The Sledge for cutting small parts is simply a 1/4 inch thick plywood piece with two runners which move along the sides of the table. Once I completed attaching the side runners, I just ran through the ply piece so that the jigsaw blade made a cut in the centre. This groove was used for indexing the fence/back support at 90 degrees. the fence is nothing but a piece of 1/2 inch plywood strip.


For holding the pieces being cut firmly, I made a holddown which can be attached or removed if not required from the fence.


The sledge is useful for cutting straight cuts at 90 degrees in small pieces.
Sketchup File
This comment has been removed by a blog administrator.
ReplyDeleteGreat to see your DIY jigsaw table.
ReplyDeleteHave you used it to cut any aluminium or steel?
Hy
ReplyDeleteHope you are doing well
I am having one question can you answer that for me my jigsaw is helding And heating while working in this jigsaw i mention the problem but didn't get it.
Regards
It was really insightful.
ReplyDeleteThanks for such a nice content.
Cheers
BTW if anyone interested more have a look sawfinder thanks